In my last blog post, I tried to explain what Prezi actually is and how it should be (or shouldn't be) compared to PowerPoint. In this post, I will try to explain some of the basics of using Prezi.
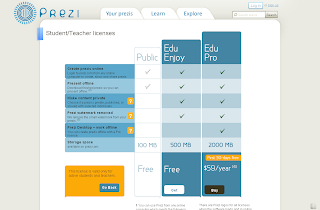
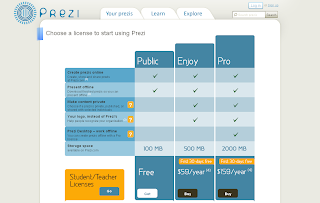
Signing up: The sign-up process is pretty easy. All you have to do is to decide which license you need. Prezi offers three licenses: Public, Enjoy and Pro. The Public license is free. However, if you are a teacher, there is another, more delicious option for you: Prezi offers a free teacher/student license which is the same with the $59 Enjoy license. It allows offline viewing (you can download your presentations), private (you don't have to make them public) and watermark free presentations (you can insert your own logo). To get this license, you have to provide an e-mail address that shows your teacher/student status. This can be either an .edu or a .k12 address. Prezi does not accept any other e-mail addresses for a teacher/student account. Though,
here you can find an alternate way that Prezi suggests to get an .edu address.
After you have received your confirmation e-mail, you can log on to the site and start creating your own Prezis.
First steps: After clicking the "New Prezi" button you will be asked to give a title for your presentation. You can also provide a brief description about your presentation, so that people will know if it fits their needs.
The Editing "Canvas": Now you are at the editing area of your Prezi. This is the place where you are going to design your Prezi presentations. On the upper left corner of the page you will see a "Bubble Menu". Here are all the tools that you need to create your presentations. You can click each "bubble" for a certain tool and other related tools will appear.
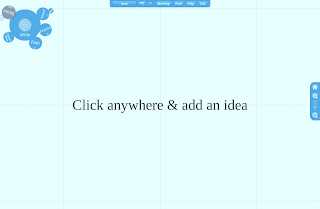 |
| The Editing Canvas |
After this point, you will start creating your presentation. To start editing your Prezi, you should become familiar with the "Bubbles" Menu, which will be the main topic of
Te@ch me Prezi: Part 3.
Click
here to continue reading Part 3


